Sarah Goke ~ Independent Stampin’ Up! Demonstrator

Welcome to a nice, quiet place to stamp & relax

Friday, September 28, 2012

Proud of myself

Pin It Now! Being a Stampin' Up! demonstrator has numerous perks but the one I really enjoy is being able to see the new catalogs a month or so before customers do :) I got my first look at the Holiday Catalog back in June & to be honest I only glanced at the ornament pictured on the front cover & was intimidated; where would I start to even attempt to figure out how to do it? Oh a part of me wanted to, no doubt, but a bigger part said it was too hard. Well thanks to another perk of being a demo, I was surfing the demo-only Stampin' Connection last week & a fellow demo Linda Heller had a video with amazing step-by-step instructions; a HUGE help for someone who is a visual learner (me) :) She made it look sooooo easy & I was inspired to go ahead & try one for myself. Here's my first ornament:


I love it! And I have to admit I am quite proud of myself considering I was extremely intimidated by it back in June. I hardly attempt 3-D projects; thinking about it the only time I made any was at a fellow demo's monthly stamp club back in Texas...so this was kinda a big deal for me :)  In fact I no more than got this one finished & my mind started thinking about gifts for teachers. So I'm going to make two for my youngest's teachers; not to mention a few other people ;) I didn't take a picture but on the back is a greeting & a place for our signature created using the Labels Collection framelits. This was so easy with the Ornament Keepsakes stamp set & coordinating Holiday Ornaments die. What's even better is purchasing the Ornament Keepsakes Bundle & saving 15% :) 

Let me know if you have any questions or want to place an order to get started on your Christmas ornaments :) 

Supply List:
Stamp Sets: Ornament Keepsakes; More Merry Messages (greeting I stamped on the back; not pictured)
Ink: Cherry Cobbler; Gumball Green
Cardstock: Very Vanilla
Accessories: Big Shot; Holiday Ornaments framelits; Labels Collection framelits; Be of Good Cheer designer series paper; Linen thread; 1/8" Taffeta ribbon in Very Vanilla (for hanging); 3-1/2S" Scalloped Tulle ribbon in Early Espresso; Vintage Faceted designer button; Large pearl; Silicone craft sheet; hot glue gun (non-Stampin' Up!)

Please email me today to request a catalog.


Thursday, September 27, 2012

My Digital Studio to the rescue

Pin It Now! Today is my good friends' birthday & I didn't mail her card out in time; she live in Hawaii & I should have mailed it out a couple of weeks ago  :( Instead of beating myself up about it I decided to send her a card via email. I did something I haven't done before: I created a card using My Digital Studio 2. I've had MDS for quite awhile now (a couple of years) but just haven't spent time playing around with it; the most I've done was create my blog signature with it. Anyway, here is my very first email-able card using MDS2:

                                                                            Front:


Inside:

It was a lot of fun playing around with everything. What I like about MDS2 is you can re-do things as many times as you need to with out wasting paper ;) I may have "thought" I wanted to use certain colors but once I saw the results I wondered what other color combos would work; I didn't have to waste time cleaning, re-inking, & stamping over & over until I liked it. I just hit the "undo" or "delete" button until I got it right. I didn't have to fuss with the stamp-a-ma-jig for perfect alignment, either. There are so many reasons to fall in love with My Digital Studio; I will be making time to play around with it more :) It will be my go-to for if/when I don't get cards mailed out in time; instead of just not sending one at all I have no excuse not to email them one on the same day :) 

If you don't already have MDS & would like more information or have any questions about anything you've seen please email me. I look forward to hearing from you! Have a wonderful day!

Tuesday, September 25, 2012

Super quick today

Pin It Now! We have been taking turns having nasty colds at our house since last week; one downside to the weather change :( Yesterday was the worst for me plus our 5 year old was home sick as well; I didn't get much accomplished it seemed like. With him out of the house today it was time to get back at it :) I needed a birthday card for a friend back in Texas who's favorite colors are red & blue. Here's what I accomplished today:
There was hardly any stamping done for this one. I used the Floral Frames framelits on the layer of River Rock before putting it over the card base. I didn't adhere it right away but used some removable tape to hold it in place while I lightly traced the outlines. After I removed the top layer I applied some sticky strip to the traced images. Then I cut strips of ribbon & put them on the sticky strips. I saw somewhere (sorry but I don't remember who I originally saw this tip from) you can used the new jumbo sticky rounds from Stampin' Up!; I wanted to try this out & didn't have any of them (I'm impatient lol) so I used the sticky strip I had on hand. I used sponges to add some color to the cut-out images before running it through the Big Shot with the Fancy Fan embossing folder. The sentiment is popped up with dimensionals. It wasn't a time consuming project but I hope she likes it :)

Thanks for stopping by today. Hope y'all stay healthy :) Signing off until next time!

Supply List:
Stamp Sets: Teeny Tiny Wishes
Ink: Midnight Muse; Real Red
Cardstock: Whisper White; River Rock; Read Red
Accessories: Big Shot; Fancy Fan embossing folder; Floral Frames framelits; sponges; Modern Label punch;  Word Window punch; Midnight Muse 3/8" stitched satin ribbon; Real Red 1/4" stitched grosgrain ribbon

Please email me to request a catalog or if you have any questions.

Monday, September 24, 2012

This type of card is always difficult to make

Pin It Now! The project I'm sharing today is a sympathy card. I never have any of these on hand & every time I have to make one I tell myself I need to make several at once so I have them. Well I never do; I guess I just can't make myself sit still long enough to "force" myself to get more than one done at a time. They are difficult to do: I don't want them to be all dreary & dull yet I don't want them to be all flowery & happy looking either. Do ya get what I mean? After trying to come up with something appropriate on my own (& struggling)  I went looking for inspiration & found a fantastic card on splitcoast stampers by Lisa Curcio. I fell in love with the simple yet elegant monochromatic card & decided to case it for my sympathy card.


I kept everything the same as Lisa's original card but changed the sentiment & I used a different ribbon. I even made a second one so I have one on hand. You could use this idea for a male birthday, thinking of you, thank you, or anything just by changing the sentiment. You can't really see it in the picture but the image is popped up on dimensionals. A simple but wow card. Sometimes it's the simple things in life, isn't it?

Thanks for stopping by today. Hope y'all have a great day.

Supply List:
Stamp sets: En Francais; Wonderfall; Petite Pairs
Ink: Crumb Cake; Early Espresso
Cardstock: Crumb Cake; Very Vanilla; Early Espresso Core'dinations; Early Espresso
Accessories: Big Shot; Woodgrain embossing folder; VersaMark; embossing buddy; white emboss powder;  Heat Tool; dauber; Soft Suede 3/8" taffeta ribbon

Please email me today if you'd like a catalog mailed directly to you.

Friday, September 21, 2012

Fall is definitely here

Pin It Now! Happy Friday! Another week is done & the weather has continued to cool off; I actually had to wear a scarf to the bus stop the past two mornings ;)  I've been inspired to create a few Christmas cards, after drinking a hot cup of coffee when I get back from the walk to the bus stop :) The card I'm sharing today makes me want to snuggle up with a cup of hot chocolate & watch a Christmas movie. Is it too early to start watching those...? ;)
I wanted to the steaming cup to be the main attraction & to help show it off so to speak I pulled out the Perfect Pennants Bigs L die to create the green background piece. The mug & steam were stamped first & then cut out using the Holiday Collection framelits. After stamping the sentiment I used the large oval punch to punch it out. I used the same punch on a scrap piece of Cherry Cobbler & off set the two ovals to give it just a touch of color behind the sentiment. This card was super quick & easy to put together thanks to the work out I gave my Big Shot :)

Hope you like the card today. Is it chilly enough where you are to snuggle up with a cup of hot chocolate, cider, coffee, or tea? Whatever your choice of beverage I hope y'all have a wonderful weekend. See ya next time!

Supply List:
Stamp sets: Scentsational Season; More Merry Messages
Ink: Cherry Cobbler; Gumball Green; Early Espresso
Cardstock: Early Espresso; Gumball Green; Very Vanilla; Cherry Cobbler
Accessories: Big Shot; Argyle embossing folder; Perfect Pennants Bigz L die; Holiday Collection framelits; Large oval punch; sponge; basic rhinestones

Please email me today if you'd like a catalog mailed to you.

Thursday, September 20, 2012

I like a challenge

Pin It Now! Today I realized it's been a long time since I've done any creative challenges so I went looking online & came across this week's challenge over at Freshly Made Sketches. Oh how I've missed participating in these; they get ya thinkin that's for sure ;)  I had fun with this one  & am planning on making another card or two using this sketch to see what other ideas pop into my head.


Here is what I came up with:


I have always liked this color combo; I first found it in the Color Coach. It was a bit of a pain working with that ribbon getting it straight & lined up "just right". It still isn't perfect but I like it; adds character ;)  Once again I used the Big Shot for everything except snipping all the ribbon pieces. I don't know what I ever did with out my Big Shot! I can't remember when I've gone a full 24 hours without using it :)
Go on & head over to Freshly Made Sketches & try the challenge this week or take a look at their past challenges. I think I'm going to do that myself since I've been out of it for awhile :)

Hope everyone has a terrific Thursday!

Shop my online store 24/7.

Supply List:
Stamp sets: Daydream Medallions; Itty Bitty Banners
Ink: Pool Party; Rich Razzleberry; Island Indigo
Cardstock: Rich Razzleberry; Pool Party; Whisper White
Accessories: Big Shot; Fancy Fan embossing folder; Floral Frames framelits; Bitty Banners framelits; Brights designer buttons; Island Indigo 3/8" ruffled ribbon; Pool Party 3/8" ruffled ribbon

Please email me today if you'd like a catalog mailed to you. 

Tuesday, September 18, 2012

The first Christmas card of the year

Pin It Now! I knew it wasn't going to take very long before I posted a Christmas card using the triple mat technique. See? I warned ya they're addicting! :)  I promise this will be the last triple mat card I'll post for awhile; I really do need to move on & turn off the part of my brain that keeps wanting to see different things using this technique. Now, how super cute is this?
And it smells yummy, too. Yes, I said smells. In case you haven't heard yet Stampin' Up! has scented emboss powder (Vanilla, Melon, & Cherry, all found in the Annual catalog) & came out with two new scents in the Holiday catalog; I used the Sugar & Spice powder on the gingerbread men. I used two different stamp sets: the mitten, sentiment, & candy cane are all in the same set. The gingerbread man is in a separate set that does have a candy cane as well (that candy cane is facing the opposite way as the one on my card & doesn't have as many stripes). I just wanted to clear that up so I don't have people emailing asking me why their candy cane doesn't look like mine :)

So have you started your Christmas cards yet? Please email me if you don't have a Holiday catalog or the Annual catalog & I will gladly mail it to you. :)

Shop my online store 24/7

Supply List:
Stamp sets: Chock-Full of Cheer; Scentsational Season
Ink: Cherry Cobbler; Gumball Green; Early Espresso
Cardstock: Very Vanilla; Cherry Cobbler
Accessories: Black StazOn; Embossing Buddy; Stamp-a-ma-jig; heat tool; VersaMark; Sugar & Spice scented emboss  powder

Please email me today if you'd like a catalog mailed directly to you.


Monday, September 17, 2012

Pin It Now!
Happy Monday! Hope everyone enjoyed their weekend & that it didn't go too quickly for y'all. The card I'm sharing today is a baby card for one of my husband's co-workers who's girlfriend just had twin girls. I hope they like it:
I love the background created with the Fancy Fan embossing folder; reminds me of a quilt. I was going to use the Perfect Polka Dots folder to coordinate with the dots in the baby buggy but was curious to see how the other folder looked; I haven't used it on a baby card. Doesn't it make ya want to reach out & touch the card? Looks like a comfy baby blanket :) This card went together in a hurry thanks to the help of a few punches, the embossing folder, & of course the Stamp-a-ma-jig to fit both girls in the buggy ;) A couple of markers & a blender pen made coloring a breeze. I am going to stamp several of the baby buggies & color some blue, pink, green, & yellow just to have on hand; the baby or any image can be added at a later time using the Stamp-a-ma-jig. It will be great having several on hand to make getting a card ready in a hurry :)

I hope you enjoyed today's card & find some time today to create a project of your choice :)  Have a wonderful day everyone! :)

Shop my online store 24/7

Supply List:
Stamp set: Baby Bundle
Ink: Perfect Plum; Pretty in Pink; Basic Gray
Cardstock: Watercolor paper; Early Espresso; Pretty in Pink; Very Vanilla
Accessories: Big Shot; Fancy Fan embossing folder; Black StazOn; Stamp-a-ma-jig; Blender pen; Subtles Designer buttons; White Baker's Twine; 1-3/4" Scallop Circle punch; 1-3/8" Circle punch; 1-1/4" Circle punch

Please email me today if you'd like a catalog mailed directly to you. 

Friday, September 14, 2012

Another triple mat card

Pin It Now! I was driving home yesterday afternoon & noticed that a lot of the foliage have started to turn colors already. I saw a lot of light green, dark orange, reddish-brown, & yellow & was inspired to make a card using some of the colors I saw. I ended up pulling out a color I don't use very often: Bravo Burgandy. Since the triple mat technique is easy & addicting I "had" to create another card using it. :)
You can create so many different looks using this simple technique. Have you tried it yet? Why not grab a color you don't use very often or forget to use? Go on & get your fingers inky!  Have a fantastic day :)

Shop my online store 24/7

Supply List:
Stamp sets: Woodgrain background; Gently Falling; Wacky Wishes (Hostess)
Ink: Crumb Cake; Bravo Burgandy; More Mustard; Cajun Craze; Early Espresso
Cardstock; Very Vanilla; Bravo Burgandy

Please email me today if you'd like a catalog mailed directly to you.


Thursday, September 13, 2012

A new technique

Pin It Now! I have seen a new technique showcased on quite a few other stampin' blogs & finally decided to try my hand at it. I don't know what the proper name of the technique is but the name I've heard in several different forums is Triple Mat. To be honest I was a bit intimidated when I first saw the technique & filed it away in the back of my mind with all those other "looks amazing but I can't do that; it's too much work" techniques/projects. Do y'all know what I mean? ;)  Well after watching an easy to follow video over at Stamp & Scrap with Frenchie I was determined to try it. She broke it down & had everything measured out so I went ahead & did one after the video was over. In fact it's a whole lot easier than I originally thought & now I'm addicted to making these! Here's (one of) the first ones I've done ~ so far ;)
All of the cards I've seen using this technique have all been with flowers & leaves; I have (as of this posting) not seen any that are kid-friendly so I wanted to see what one would look like. I'm really happy with the way it turned out & I can use it for nieces & nephews birthdays by just changing up the color combos.

I didn't take step-by-step pictures but if you'd like a visual Brian King has pictures walking ya through it. You can go check out Frenchie if you'd like to take a peek at the video that helped me get through it ;) Go on & give it a try but don't say I didn't warn ya: they're addicting! :)

Have a great day stampin'!

Shop my online store 24/7

Supply List:
Stamp set: Patterned Party
Ink: Midnight Muse; Raspberry Ripple; Summer Starfruit; Gumball Green
Cardstock: Whisper White; Gumball Green

Please email me today if you'd like a catalog mailed directly to you.


Wednesday, September 12, 2012

Here comes autumn

Pin It Now! For the past two weeks we've had fall-like weather over here & it's been really nice. Cool enough the kids need light jackets at the bus stop in the morning but warm enough after school they don't need one. With the kids back in school, cooler weather, & the dulling of the greenery I've been thinking about autumn & the gorgeous colors that will soon be on display this year. It's been over three years since we've experienced any true fall colors; living in far west Texas we didn't see colorful trees ;). Over here we are surrounded by forests & are anxiously awaiting God's awesome display of color. While we're waiting I decided to pull out some new goodies that I haven't played with yet & try to create some fall on a card. What do ya'll think?


When I first started playing around I didn't know what this card would be used for so it was sentiment-less when it was finished. However when my husband came home from work that day he asked if I had anything for a co-worker who was having surgery soon so I added the "thinking of you" at the bottom. The colors work great for a masculine card, don't ya think? To create all the different shades I took sponge daubers & inked up the edges of the leaves after they were cut out. The best part is I didn't have to spend forever cutting them all out: the stamp set coordinates with a Big Shot die! (the cute little acorn too). And how cool is the "tree"? I used the new core'dinations card stock & new Woodgrain embossing folder, all found in the new Holiday catalog. I love how it looks (& it feels real, too)

Here are a few quick tips for using the Autumn Accents die & coordinating Wondrfall stamp set:

  • Use the die to create the leaves/acorn first.
  • Before stamping the images onto the shapes use a bit of non-permanent adhesive on the back of the shape to prevent it from moving around.
  • Use the Stamp-a-ma-jig to help you line up the images perfectly.

Remember you can always order online 24/7 from my business website or email me if you have any questions.

Supply List:
Stamp set: Wonderfall; Best Dad Ever
Ink: More Mustard; Cajun Craze; Cherry Cobbler; So Saffron; Pumpkin Pie; Soft Suede; Early Espresso; River Rock
Cardstock: Very Vanilla; Early Espresso Core'dinations
Accessories: Big Shot; Woodgrain embossing folder; Autumn Accents die; sponge daubers; sanding block; linen thread

Please email me today if you'd like a catalog mailed directly to you.


Tuesday, September 11, 2012

Quick & Easy

Pin It Now!
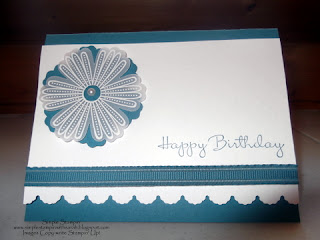
Does this ever happen to you: a friend or relative's birthday is coming up & you think there's plenty of time to get their card in the mail, only to realize you need to have it in the mail in less than an hour? Or maybe that only happens to me...well, it happened to me last week & I almost panicked: I have to mail things back to the states at least a week ahead of time if I want it to reach the recipient on time. I needed something fast & easy so I grabbed the Mixed Bunch stamp set & got right to work. Here's what came from my mad-dash to the finish:


It's hard to see in the photo but I ran the white layer through the Big Shot using the Perfect Polka Dots embossing folder. *TIP: If you want a sentiment be sure to stamp it first before running it through the Big Shot. I then ran it back through the Big Shot with one of the Adorning Accents edgelits to create the scallop edge. The main flower image was stamped onto some vellum using VersaMark then  heat embossed with white emboss powder before punching it out using the coordinating Blossom punch. It's also kind of hard to tell but the white layer is popped up on dimensionals (sneaky trick to hide the ends of the ribbon). I'm quite pleased with the finished product & hope my friend likes it as well. 

Go on & see how many of these fun & quick little creations you can make today; I dare ya! :)  Enjoy the possibilities today!

Supply List:
Stamp set: Mixed Bunch; Happiest Birthday Wishes (hostess, retired)
Ink: Island Indigoo
Cardstock: Island Indigo; Whisper White; White Vellum
Accessories: Big Shot; Perfect Polkda Dots embossing folder; Adorning Accents edgelits; VersaMark; Blossom punch; White emboss powder; heat tool; Itty Bitty Shapes punch pack; basic jewels; Island Indigo 3/8" ruffled ribbon

Please email me today if you'd like a catalog mailed directly to you.

Saturday, September 8, 2012

Changing it up

Pin It Now! Yesterday I shared with you the first card in a long time, the one I CASEd from the catalog. After I finished it I started thinking about all the different color combos you could use so I immediately made another one, only I changed it up a little & I "think" I like this one better :)
What a difference a few little changes make, right? Change the color, pattern stamped on the butterflies, & embossing folder & imagine all the possibilities ya'll can come up with :)  And to think it started by CASEing a project in the Annual Catalog just to get the creative juices flowing again. I may have to try creating a masculine card using this sketch, since I never seem to have a masculine card on hand when the need arises. (Like last minute co-worker birthdays my husband notoriously mentions the night before he needs to take it to work...*smirk*)

Once again thanks for hanging out with me for a few minutes :) Hope ya'll have a great day!

Please email me  today if you'd like a catalog mailed directly to you.

Supply List:
Stamp sets: En Francais; Itty Bitty Banners; Papillon Potpouri
Cardstock: Summer Starfruit; Whisper White; Midnight Muse; Primrose Petals
Ink: Summer Starfruit; Midnight Muse: Primrose Petals
Accessories: Big Shot; Argyle embossing folder; Labels Collection framelits; Elegant Butterfly punch


Friday, September 7, 2012

It's been 7 months...!

Pin It Now!
I knew I hadn't posted anything in awhile but wow! 7 months!? Time has a way of getting away from us at times doesn't it? Life threw some issues at us, which shouldn't be a surprise when you're a military family :) However the news that we would be moving to Germany was a big one, even though we knew it was eventually coming (I mean we've had over 10 years to prepare *smile*). When we were first told at Christmas time we told ourselves we'd have plenty of time to get everything ready for the move in May/June....we should have known better! There's always a ton of stuff to do leading up to a move but a whole new set of hurdles to overcome when that move is overseas. Long story short the kids & I moved about 6 weeks after my husband; so yes, a lot of the last-minute details fell on me :) On the huge plus side we had a house by the time the rest of us arrived :) The one major downside to moving overseas is not having household goods for a long time; as a matter of fact are stuff took 60+ days to arrive...try being without all your crafting goodies that long!!! lol At least I can look back at the transition time & laugh instead of cry :) We're almost completely settled (garage & basement need to get arranged properly but hey, at least my office is all put to rights *smile*) Now that school has started I have the entire day to myself so I can FINALLY get back into stamping! Enough rambling; here's my first card made in a long time:
I admit after not being able to get my fingers inky for so long my creative mind was running blank; or maybe there were too many things rattling around up there? In order to jump-start the creative juices flowing again I browsed through the Annual Catalog & decided to CASE one of the cards I saw. I didn't copy it exactly but  it's pretty close. It went together pretty quickly & I used a color combo that I'm not sure I would have come up with on my own. That's just one of the many pros of CASEing, "forcing" yourself to think out of the box & try something new :)

Thanks for hanging in there & not giving up on me completely :) I'm back & my plan is to post more regularly; now that my "baby" is in kindergarten I don't have any interruptions during the day ;) Hope you're able to get some stamping or other crafting in today!

Supply List:
Stamp sets: En Francais; Itty Bitty Banners; Papillon Potpouri
Cardstock: Pool Party; Whisper White; Calypso Coral; Lucky Limeade
Ink: Pool Party; Calypso Coral; Lucky Limeade
Accessories: Big Shot; Lacy Brocade embossing folder; Labels Collection framelits; Elegant Butterfly punch

Please email me today if you'd like a catalog mailed directly to you.